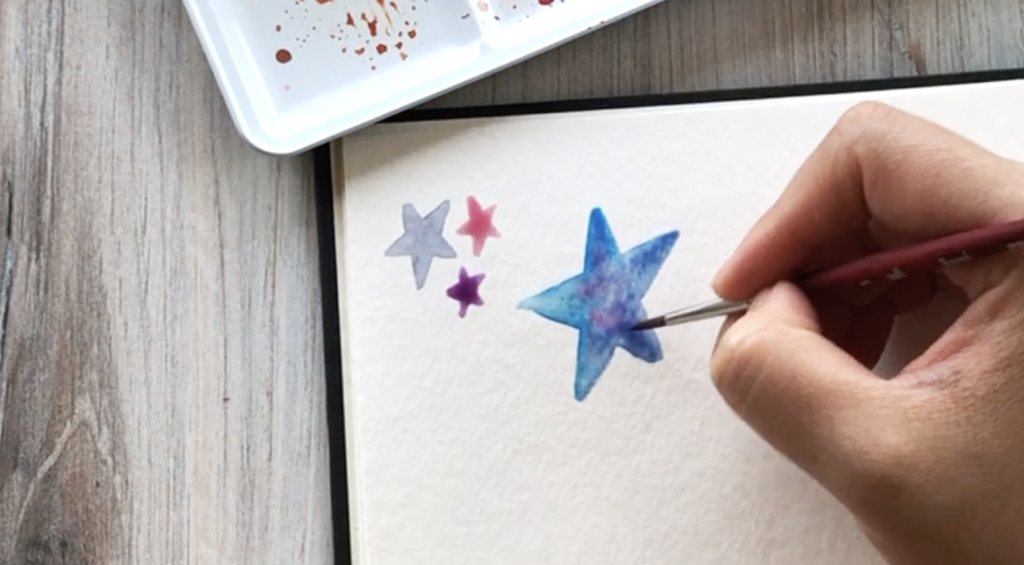
I’m ALL for using simple painting techniques to build up to really impressive pieces of work. If you can paint a star, you can definitely make this piece.
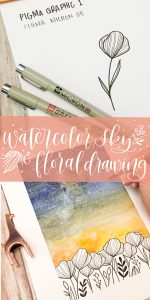
This project is perfect for journaling or even for some adorable wall art. I had the pleasure of collaborating with Strathmore Art to develop a creative watercoloring workshop.
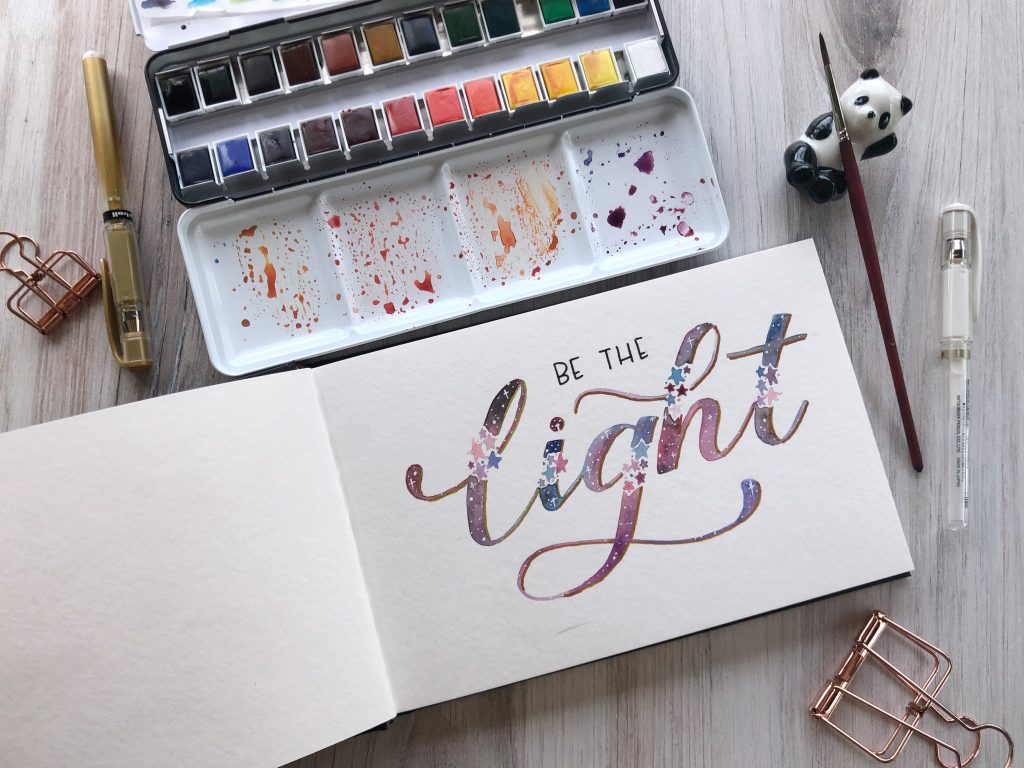
Tools I Used:
- Strathmore 400 Series Watercolor Journal Cold Press
- Daler-Rowney Aquafine Watercolor Set of 24 (not the exact same set I used but has the same colors!)
- Princeton Velvetouch Round 4 Watercolor Brush (size 2 will work also)
- Pencil
- Kneaded eraser
- Uniball Signo White Gel Pen
- Uniball Signo Gold Gel Pen
- Sakura Micron 05 Black Pen
This workshop was created in collaboration with Strathmore Art. All opinions are my own. I do not endorse products that I would not personally use. Some links are affiliate links which means I would get a small commission if you choose to purchase. This helps me continue to make free tutorials!
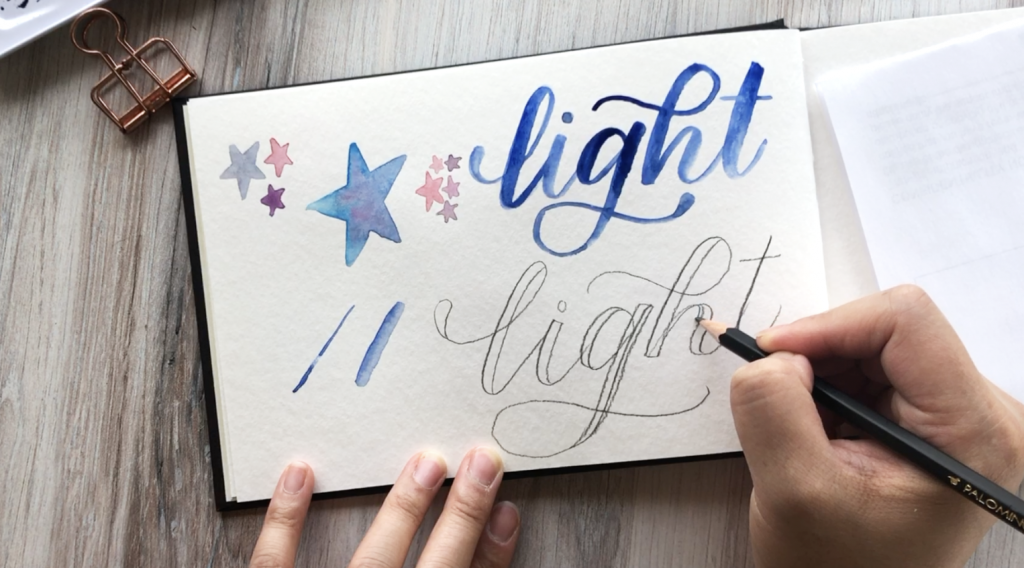
Step 1: Practice painting some stars
Let’s begin with some practice before we jump into the final piece. I mentioned earlier that we will be combining simple painting techniques to come up with something really amazing.
Begin by painting some simple stars. Experiment with the colors until you’re happy with the color motif. It is easier to paint smaller stars with a smaller tip paint brush. Here, I’m using a size 2 round.
I chose to use cool colors in the blue and purple family since I want to paint the galaxy lettering in this same color scheme.
Step 2: Practice your faux calligraphy
If you’ve never done faux calligraphy, you’re in luck because I have a little practice sheet for you!
Let’s sum up the process if you’ve never done faux calligraphy before. Start by writing the desired word in cursive. I’ll be writing the word “light”. Next, thicken the lines that are supposed to be “downstrokes”. (DOWNSTROKE = when you’re writing and your pencil moves DOWN the page vs UP the page). For the areas of the lettering that your pencil moves downward, you want to thicken those lines. This achieves the look of a brush pen calligraphy by using every day tools.
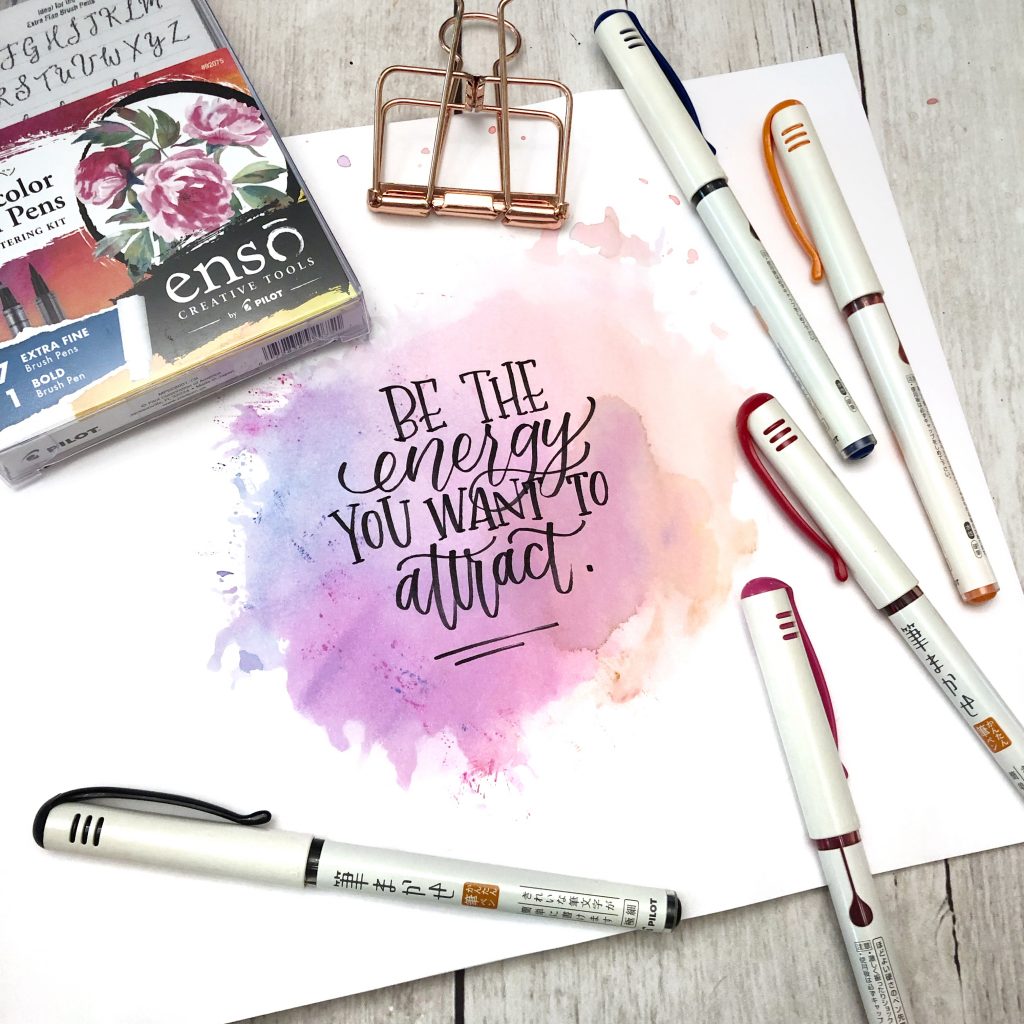
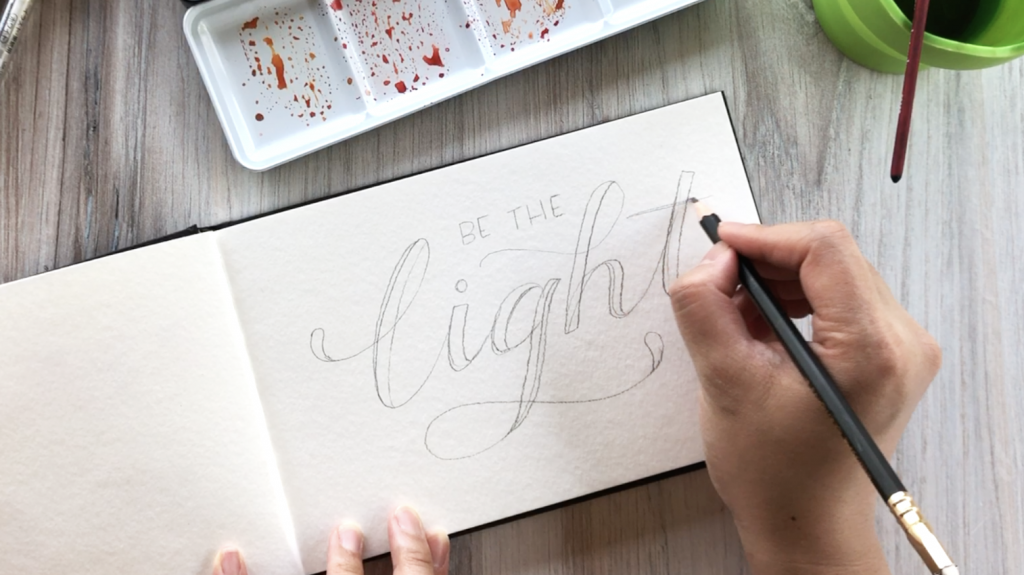
Step 3: Pencil your lettering onto your watercolor paper
Once you have some practice under your belt, let’s get started on the final piece. Use a pencil to lightly outline the letters you will paint over. I also wrote out “BE THE” above the cursive word “light”.
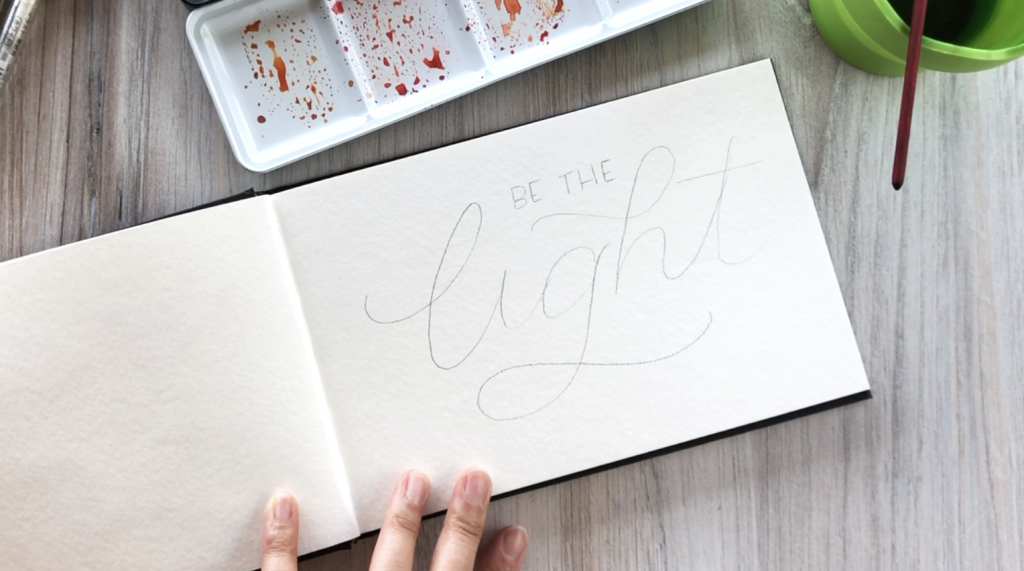
Since you have plenty of practice now with faux calligraphy, go ahead do thicken the downstroke lines of the word “light” as well.
Step 4: Use a kneaded eraser to lighten the tracing lines
Gently roll a kneaded eraser over your pencil markings. This will make the pencil markings less obvious when you paint over them
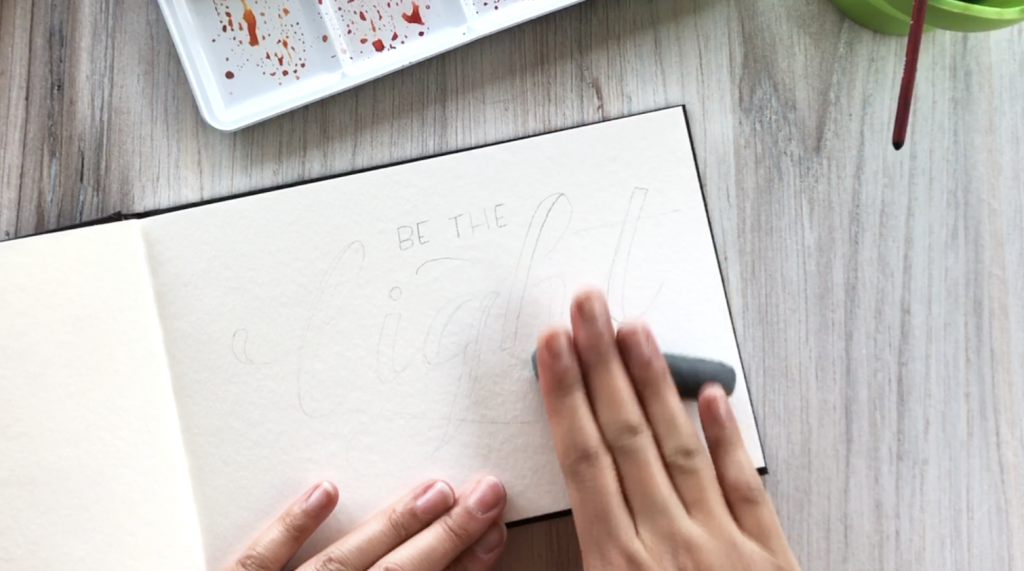
Using a kneaded eraser instead of a regular eraser lets you more gently remove dark pencil lines and not remove them completely. A kneaded eraser also has the added bonus of being less messy (no eraser dust!).
Make sure that you can still see your lines. You want them faint enough to be less visible once paint is added but not so faint that you can’t see where you’re supposed to be painting.
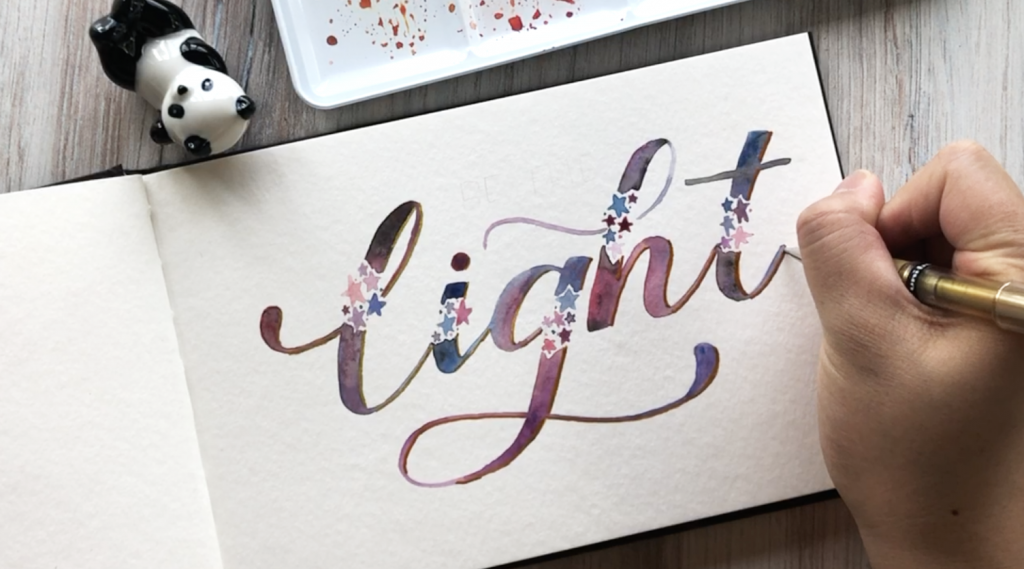
Step 5: Paint tiny stars on the thick downstrokes of your faux calligraphy lettering
Start by painting tiny stars in clusters along the thicker parts of your faux calligraphy letters. I chose to only do it for one part of each letter. For example, the letter “g” has two areas that has thicker downstrokes but I chose to paint on only one of the thicker lines.
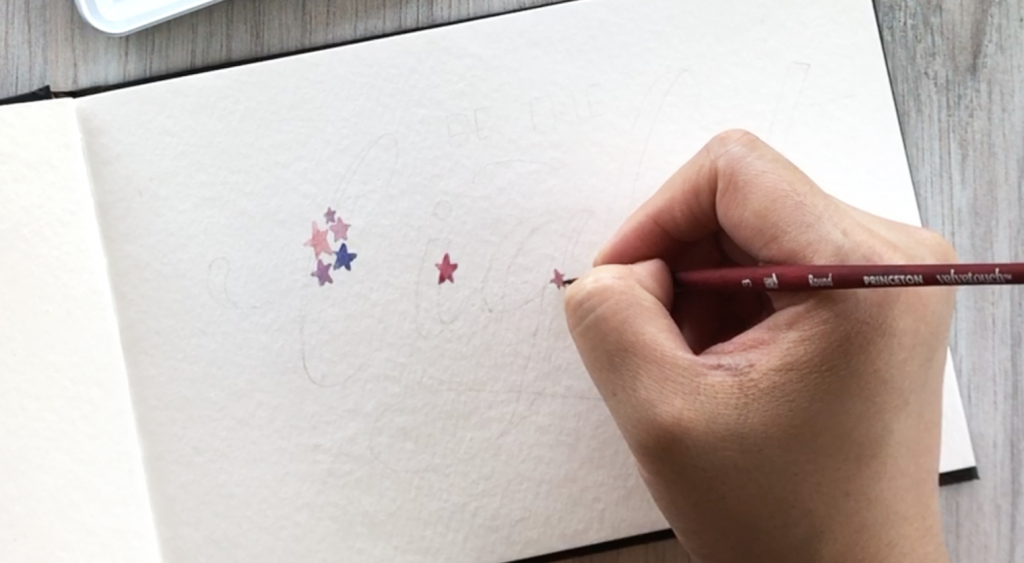
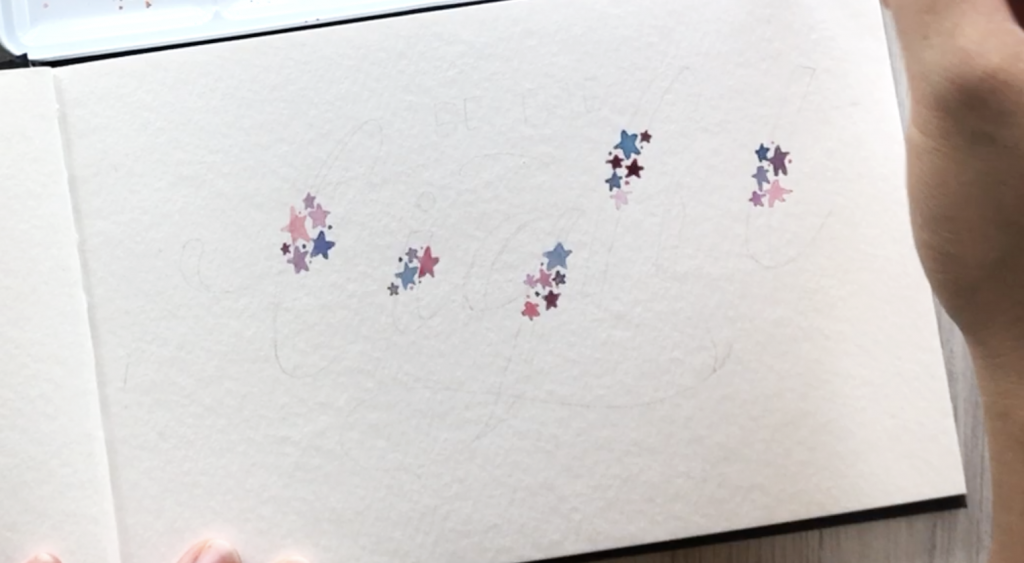
Paint little clusters of 4-5 stars. I like to switch up the colors so you get a little variety. Like I mentioned previously, I’m using pinks, blues, and purples for the stars to match the galaxy lettering inside the word “light” but feel free to have fun with a number of color combinations!
Let the painted stars dry before moving onto the next step!
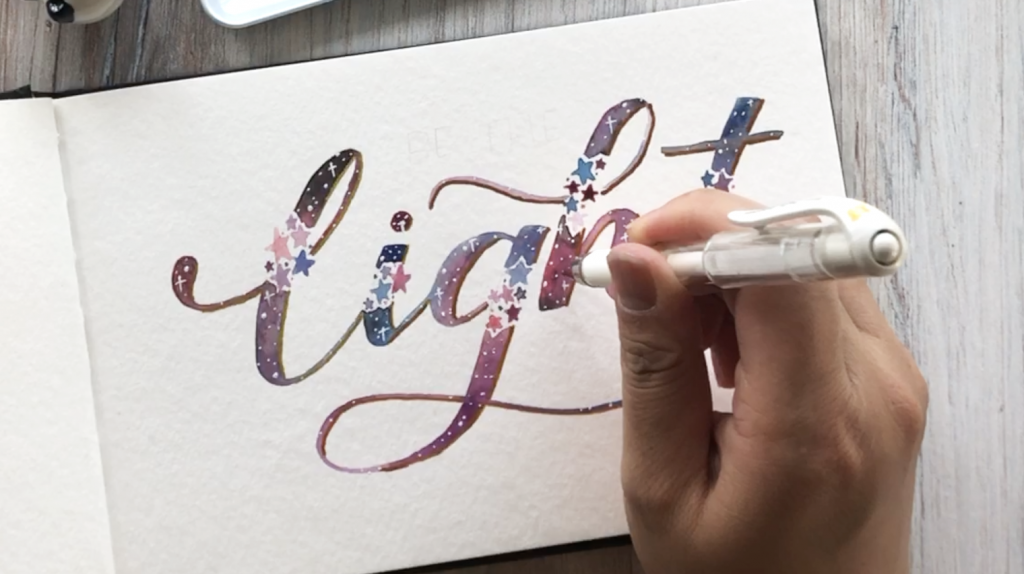
Step 6: Paint in your “faux calligraphy” letters
Once the stars are dry, use the same brush pen to fill in the faux brush calligraphy lettering. Follow the pencil lines as best you can. Here is where a round tip watercolor brush comes in handy. You can see that the tip of the brush is capable of painting extremely thin lines but it can also be flattened to paint thicker lines as well.
Work patiently and slowly here. It is really easy to make a mistake (speaking from experience!). If that happens, it’s still possible to save it by painting your lines a little thicker.
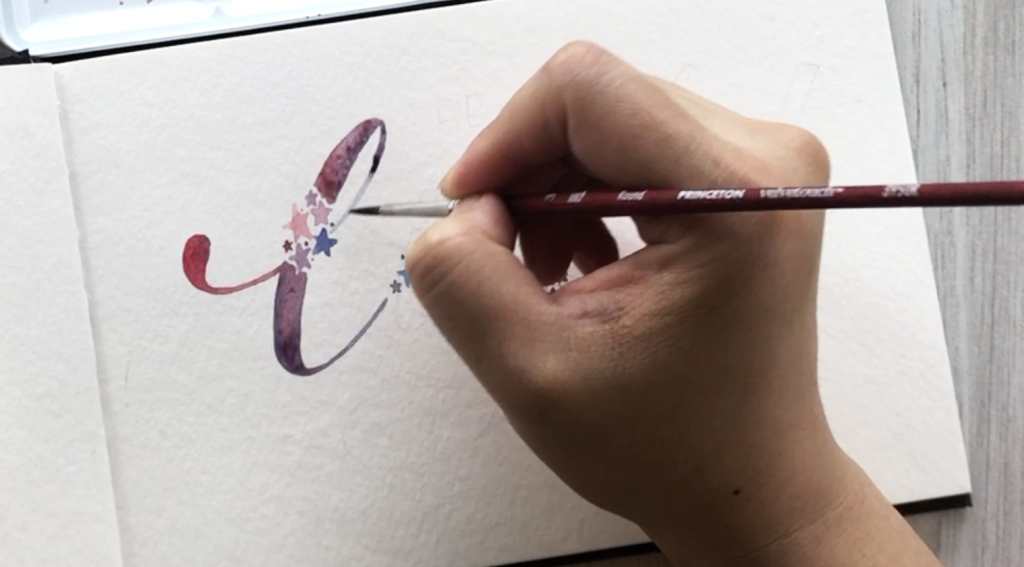
Again, you want to allow the paint to completely dry before moving on to the next step. Smudging happens!
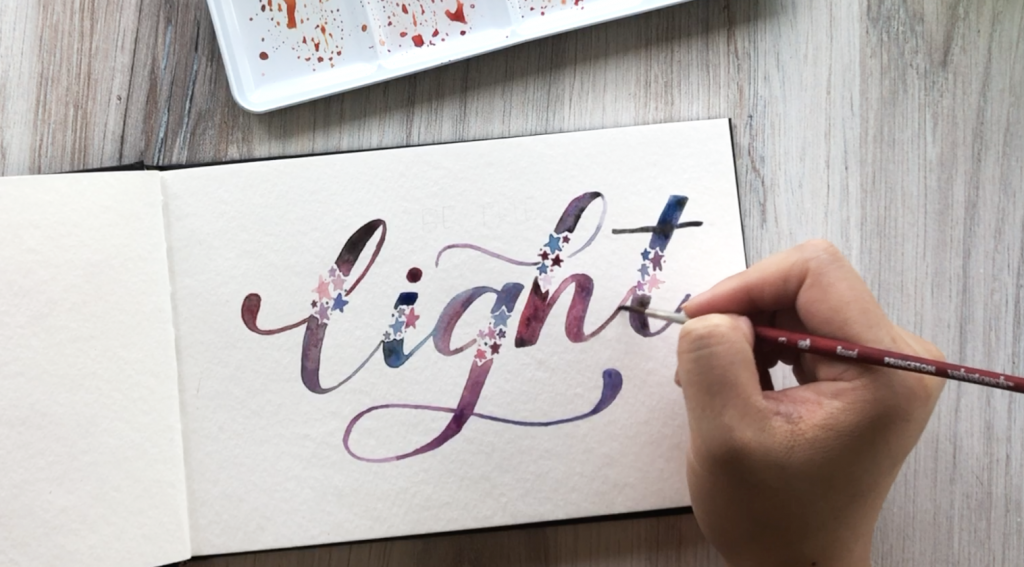
Step 7: Use a gold gel pen to add a “drop shadow” to your lettering
This part is totally optional. The effect is so subtle when far away but adds a nice little touch if you examine it a little closer.
A drop shadow adds a little line (for additional contrast) behind a light source. If you refer to the photo below, imagine the little panda pen holder is a light source like a lamp. Visualize it shining on the word “light”, creating a shadow that falls under the word. Now use your gel pen to draw a line where this shadow would be.
Step 8: Use a white gel pen to add tiny stars
Add a white gel pen to add stars of various sizes. I like to mix up tiny dots (for far away stars) and cross “t” stars (for closer stars). Changing up the sizes of stars will make the whole piece more visually interesting.
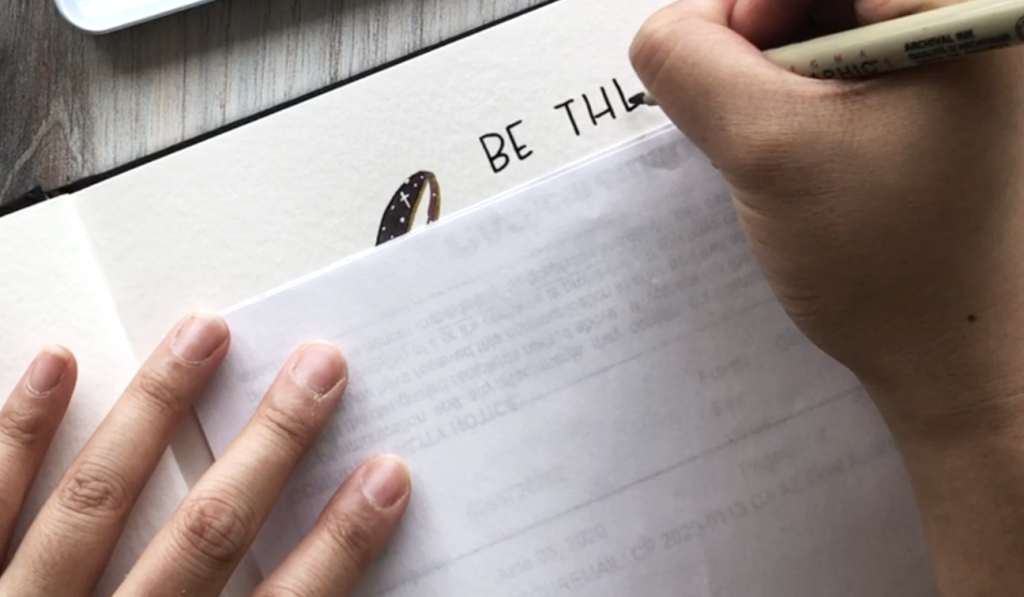
Step 9: Use a marker to add in any additional lettering
Since I chose to write the phrase “be the light”, I wanted the focus word to be “light”. I’m using a regular Sakura Micron 05 pen to write the rest of the phrase (“be the”) in a regular sans serif upper case style.
I like using scrap piece of paper to help guide me in writing straight and also to prevent smudging of the painted part.
This is a really fun and easy piece to add to a journal with your favorite short quote or even cute wall art for an office or nursery. Now that you have the techniques to do this style of painting, go wild with different quotes or phrases!
If you want to to learn more about brush lettering calligraphy, check our my Modern Calligraphy book or an instant download from my Etsy shop! I’d love to see what you guys all come up with! Let me know @Leslie.writes.it.all!